CentOS 用の Auto installation プログラムはなかったので、
の内容どおりに手動インストールを行ってみた。
Step 1: Installation Prerequisite Steps
HPLIP のリリースノートを確認しろと。
HP OfficeJet 100 Mobile L411 は、Ver 3.11.3 の時にマージされたようだ。故にOK!
Step 2: Install Dependency Packages
A. Install the development environment.
まず、開発ツールがインストールされてるか確認しろって。
Gnome のメニューから「アプリケーション」→「ソフトウェアの追加/削除」を選択。
「ブラウズ」タブで「開発」を選び、「開発ツール」にチェックが付いていることを確認。バッチリよ。
B. Install the HPLIP dependencies.
HPLIP のインストールに依存性のあるソフトウェアのインストール。
# yum -y -d 10 -e 1 install cups cups-devel gcc-c++ ghostscript libjpeg-devel glibc-headers libtool libusb-devel make python python-devel PyXML openssl-devel net-snmp-devel policycoreutils-gui PyQt PyQt-devel dbus-python notify-python sane-backends sane-backends-devel sane-frontends xsane python-imaging python-imaging-devel<略>Dependency Installed:beecrypt.x86_64 0:4.1.2-10.1.1 beecrypt-devel.x86_64 0:4.1.2-10.1.1e2fsprogs-devel.x86_64 0:1.39-36.el5_9 elfutils-devel.x86_64 0:0.137-3.el5elfutils-devel-static.x86_64 0:0.137-3.el5 elfutils-libelf-devel.x86_64 0:0.137-3.el5elfutils-libelf-devel-static.x86_64 0:0.137-3.el5 gnutls-devel.x86_64 0:1.4.1-14.el5_10gphoto2.i386 0:2.2.0-3.el5 gphoto2-devel.x86_64 0:2.2.0-3.el5hpijs.x86_64 1:1.6.7-6.el5_6.1 hplip.x86_64 0:1.6.7-6.el5_6.1keyutils-libs-devel.x86_64 0:1.2-1.el5 krb5-devel.x86_64 0:1.6.1-71.el5_10.1lcms.x86_64 0:1.18-0.1.beta1.el5_3.2 libexif.i386 0:0.6.21-1.el5_8libexif-devel.x86_64 0:0.6.21-1.el5_8 libgcrypt-devel.x86_64 0:1.4.4-7.el5_10libgpg-error-devel.x86_64 0:1.4-2 libieee1284.i386 0:0.2.9-4.el5libieee1284.x86_64 0:0.2.9-4.el5 libieee1284-devel.x86_64 0:0.2.9-4.el5libmng.x86_64 0:1.0.9-5.1 libsane-hpaio.x86_64 0:1.6.7-6.el5_6.1libselinux-devel.x86_64 0:1.33.4-5.7.el5 libsepol-devel.x86_64 0:1.15.2-3.el5lm_sensors.x86_64 0:2.10.7-9.el5 lm_sensors-devel.x86_64 0:2.10.7-9.el5net-snmp.x86_64 1:5.3.2.2-22.el5_10.1 net-snmp-libs.i386 1:5.3.2.2-22.el5_10.1nspr-devel.x86_64 0:4.10.2-2.el5_10 nss-devel.x86_64 0:3.15.3-4.el5_10qt.x86_64 1:3.3.6-26.el5 rpm-devel.x86_64 0:4.4.2.3-34.el5sane-backends-libs.i386 0:1.0.18-5.el5 sane-backends-libs.x86_64 0:1.0.18-5.el5sip.x86_64 0:4.4.5-3 sip-devel.x86_64 0:4.4.5-3sqlite-devel.x86_64 0:3.3.6-7 tix.x86_64 1:8.4.0-11.fc6tkinter.x86_64 0:2.4.3-56.el5 zlib-devel.x86_64 0:1.2.3-7.el5Complete!
66個もインストールされた。
C. Pre Installation Step(s)
すでに HPLIP がインストールされていれば、予め削除しておく。
# rpm -ev --nodeps libsane-hpaio# rpm -ev hplip-guierror: package hplip-gui is not installed
hplip-gui は入ってないんだな。
# rpm -ev hpliperror: Failed dependencies:libhpip.so.0()(64bit) is needed by (installed) hpijs-1.6.7-6.el5_6.1.x86_64hplip = 1.6.7-6.el5_6.1 is needed by (installed) hpijs-1.6.7-6.el5_6.1.x86_64
ん???hpijs に依存関係があるのか。先に hpijs を削除すっか。
# rpm -ev hpijs
error: Failed dependencies:hpijs = 1:1.6.7-6.el5_6.1 is needed by (installed) hplip-1.6.7-6.el5_6.1.x86_64
そうか、hpijs は先に hplip 消さないと駄目なんやね!・・・って、おい!!(^^;
こういう時は、
# rpm -ev hplip hpijs
こうか!
D. Link the libcrypto library. By default they are not linked as needed for HPLIP.
HPLIP は libcrypto.so を参照するので、バージョン付きの名前のファイルを libcrypto.so という名前にシンボリックリンクする。
# ls -la /lib/libcrypto.so*-rwxr-xr-x 1 root root 1298276 Jan 29 16:37 /lib/libcrypto.so.0.9.8elrwxrwxrwx 1 root root 19 May 23 20:13 /lib/libcrypto.so.6 -> libcrypto.so.0.9.8e# ln -s /lib/libcrypto.so.0.9.8e /lib/libcrypto.so
Step 3: Disable SELinux
インストール時は SELinux を無効に。
俺は最初から無効にしてるので(セキュリティ厨に叱られる~(笑))問題無し。
# cat /etc/selinux/config# This file controls the state of SELinux on the system.# SELINUX= can take one of these three values:# enforcing - SELinux security policy is enforced.# permissive - SELinux prints warnings instead of enforcing.# disabled - SELinux is fully disabled.SELINUX=disabled# SELINUXTYPE= type of policy in use. Possible values are:# targeted - Only targeted network daemons are protected.# strict - Full SELinux protection.SELINUXTYPE=targeted
Step 4: Download HPLIP
A. Click here to Download the Regular Tarball
hplip-3.14.4.tar.gz をダウンロード。(wget で直接取っちゃう)
# wget http://prdownloads.sourceforge.net/hplip/hplip-3.14.4.tar.gz--2014-05-24 18:28:42-- http://prdownloads.sourceforge.net/hplip/hplip-3.14.4.tar.gzResolving prdownloads.sourceforge.net... 216.34.181.59Connecting to prdownloads.sourceforge.net|216.34.181.59|:80... connected.HTTP request sent, awaiting response... 301 Moved PermanentlyLocation: http://downloads.sourceforge.net/project/hplip/hplip/3.14.4/hplip-3.14.4.tar.gz [following]--2014-05-24 18:28:43-- http://downloads.sourceforge.net/project/hplip/hplip/3.14.4/hplip-3.14.4.tar.gzResolving downloads.sourceforge.net... 216.34.181.59Reusing existing connection to prdownloads.sourceforge.net:80.HTTP request sent, awaiting response... 302 FoundLocation: http://jaist.dl.sourceforge.net/project/hplip/hplip/3.14.4/hplip-3.14.4.tar.gz [following]--2014-05-24 18:28:43-- http://jaist.dl.sourceforge.net/project/hplip/hplip/3.14.4/hplip-3.14.4.tar.gzResolving jaist.dl.sourceforge.net... 150.65.7.130, 2001:df0:2ed:feed::feedConnecting to jaist.dl.sourceforge.net|150.65.7.130|:80... connected.HTTP request sent, awaiting response... 200 OKLength: 21414140 (20M) [application/x-gzip]Saving to: `hplip-3.14.4.tar.gz'100%[======================================================================>] 21,414,140 3.75M/s in 5.5s2014-05-24 18:28:48 (3.68 MB/s) - `hplip-3.14.4.tar.gz' saved [21414140/21414140]# ls -la hplip-3.14.4.tar.gz-rw-r--r-- 1 root root 21414140 Apr 9 02:04 hplip-3.14.4.tar.gz
B. Go to the directory where you downloaded the HPLIP tarball.
はいはい。
C. Uncompress the tarball.
# tar xvfz hplip-3.14.4.tar.gz<略>hplip-3.14.4/prnt/ps/hp-color_laserjet_m855-ps.ppd.gzhplip-3.14.4/prnt/ps/hp-laserjet_400_m401-ps.ppd.gzhplip-3.14.4/prnt/__init__.py
D. Change your working directory to the hplip-3.14.4 directory.
# cd hplip-3.14.4
Step 5: Configure HPLIP for installation
CentOS のバージョン(5.X or 6.X)と、CPU の処理ビット数(32bit or 64bit)別にコンフィグ内容が違うので注意。
うちは、64bit の CentOS 5.X ユーザなので、それ用のコンフィグを実行。
# ./configure --prefix=/usr --with-hpppddir=/usr/share/cups/model/HP --libdir=/usr/lib64 --enable-qt3 --disable-qt4 --disable-hpcups-install --disable-cups-drv-install --disable-cups-ppd-install --enable-hpijs-install --enable-foomatic-drv-install --enable-foomatic-ppd-install --enable-foomatic-rip-hplip-install --disable-fax-build --disable-dbus-build --enable-network-build --enable-scan-build --disable-policykit --enable-libusb01_build --enable-udev_sysfs_rules --enable-doc-build<略>config.status: creating hplip.listconfig.status: creating data/policykit/com.hp.hplip.serviceconfig.status: executing depfiles commandsconfig.status: executing libtool commands
うむ。特にエラーは出ていないようだ。
Step 6: Run Make
「root で実行すんなよ!」って注意書きあるけど、ユーザが俺しかいない CentOS 環境なので、全部 root のままでやっちゃう。
こういうの、何がなんでも「危ないから駄目」とか言う人いるけど、ケース・バイ・ケースですよ(笑)
# make<略>libtool: link: g++ -DAPDK_DJ660 -DAPDK_DJ6xx -DAPDK_DJ6xxPhoto -DAPDK_DJ8xx -DAPDK_DJ9xx -DAPDK_DJ9xxVIP -DAPDK_DJ630 -DAPDK_APOLLO2XXX -DAPDK_APOLLO21XX -DAPDK_APOLLO2560 -DAPDK_DJ600 -DAPDK_DJ350 -DAPDK_DJ8x5 -DAPDK_PSP100 -DAPDK_AUTODUPLEX -DAPDK_HIGH_RES_MODES -DAPDK_LJMONO -DAPDK_DJ540 -DAPDK_DJ850 -DAPDK_DJ890 -DAPDK_DJ3320 -DAPDK_LJCOLOR -DAPDK_DJGENERICVIP -DAPDK_LJJETREADY -DAPDK_LJFASTRASTER -DAPDK_BUFFER_SEND -DAPDK_LDL_COMPRESS -DAPDK_EXTENDED_MEDIASIZE -DAPDK_MLC_PRINTER -DAPDK_DJ3600 -DAPDK_LJZJS_MONO -DAPDK_LJZJS_COLOR -DAPDK_LJM1005 -DAPDK_QUICKCONNECT -DAPDK_LITTLE_ENDIAN -DAPDK_AUTO_INCLUDE -DAPDK_LINUX -DNDEBUG -g -O2 -DCONFDIR=\"/etc/hp\" -o hppgsz hppgsz-PrinterProperties.o ./.libs/libapdk.a -ljpeg -ldl -lcrypto
特にエラーは出ずに終了。
Step 7: Run Make Install
問題なさそうなのでインストールを行う。
# make install<略>make[2]: Leaving directory `/home/shinoda/hplip-3.14.4'make[1]: Leaving directory `/home/shinoda/hplip-3.14.4'
エラー出ず終了。
Step 8: Post Installation Step(s)
A. For normal users other than root add user name to "lp" and "sys" group:
プリンタを使うユーザを、lp, sys グループに参加させる。
# grep lp /etc/grouplp:x:7:daemon,lp# grep ^sys /etc/groupsys:x:3:root,bin,adm# /usr/sbin/usermod -a -G lp,sys hogehoge# grep lp /etc/grouplp:x:7:daemon,lp,hogehoge# grep ^sys /etc/groupsys:x:3:root,bin,adm,hogehoge
そして、PC の再起動か、ユーザの再ログオンを。
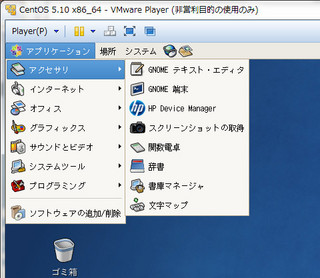
Gnome のアプリーケーションメニューに「アクセサリ」→「HP Device Manager」というのが追加されている。
B. If you are going to be setting up a printer with USB and the printer is already plugged in, you will need to do one of the following:
最初からプリンタを認識していたので、USB ケーブルを抜き差ししたりは不要だった。
Step 9: Configuring your printer using hp-setup
と、Step 8 までは問題なく作業が進んだが、最後の最後に信じられないことが!!
「hp-setup が実行出来ねえ!!!」
いい加減にしろ、ヒューレット・パッカード!!
hp-setup を実行すると、
warning: python-dbus not installed.warning: Fax setup disabled - Python 2.3+ required.
というエラー(ワーニングだけど)が出て、最終的に、
warning: Fax setup disabled - Python 2.3+ required.
となってプリンタ設定画面が先に進めなくなるのである。
なんじゃ、こりゃ。
ちなみに、Python は python-2.4.3 が入っているし、dbus-python-0.70-9 も入っている。
そう、どうやら python-dbus ではなく、CentOS のパッケージ名は dbus-python なのに、ヒューレット・パッカードが誤って指定しているようである。
海外の掲示板サイトでもそのことを指摘している人がいたが、回答は「ヒューレット・パッカードが責任を負わないフリーソフトなんだから、自力でなんとかせい」であった。
やっぱ、プリンタはキヤノンかエプソンの二択ですよ、実際。